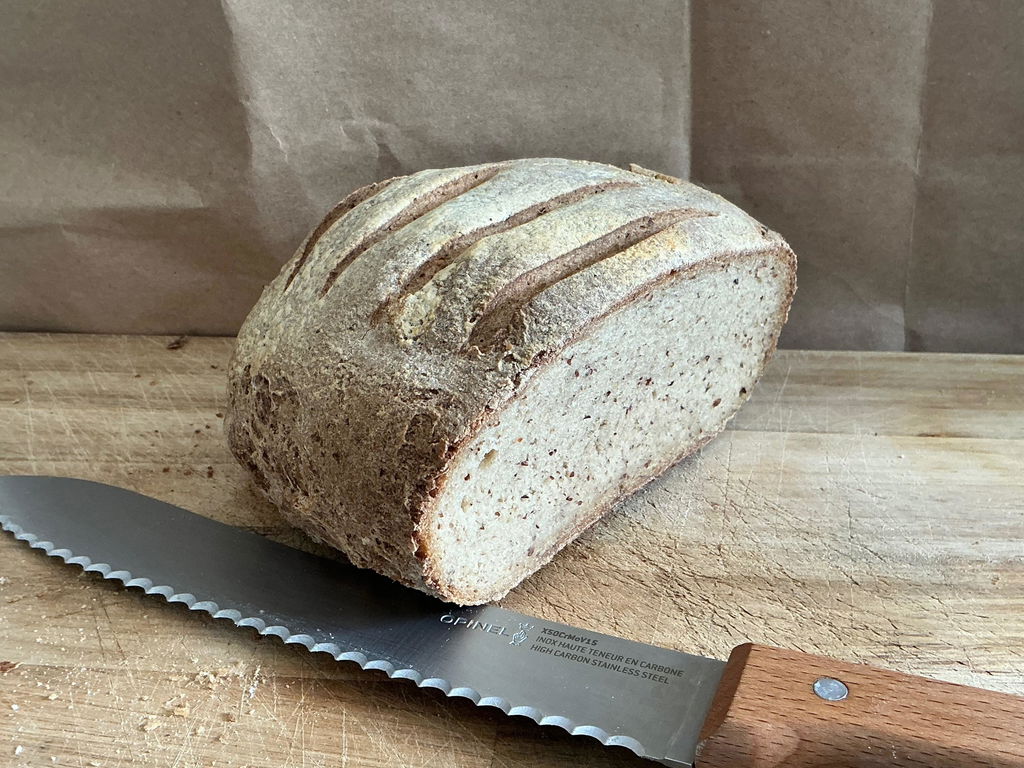
Imagine the irresistible aroma of fresh bread wafting through your home, the joy of slicing into a warm, crusty loaf, and the confidence of knowing every ingredient is wholesome. At Simple Bake, we've simplified the art of baking bakery-quality, gluten-free sourdough bread, no experience needed, just your enthusiasm. Let's turn your kitchen into a bakery with ease and flavour!
Discover the whole journey of baking perfect sourdough! Our comprehensive guide takes you from waking up your dry starter to pulling out a stunning, golden loaf that’s sure to impress. Whether you're working with Buckwheat, Oat, Chickpea, or any of our heritage grain premixes, these expert techniques will help you create consistently delicious bread every time.
What's Inside Your Simple Bake Package
When your order arrives, you'll find:
- One pouch of bread premix: our carefully crafted blend of organic, gluten-free flours and ingredients
- One separate pouch of dry sourdough starter kept apart to maintain freshness until you're ready to bake
This two-pouch system ensures maximum freshness and gives you complete control over your baking timeline.
Part 1: Waking Up Your Sourdough Starter (Days 1-3)
Think of your dry sourdough starter as being in a deep state of dormancy. Over the next 2-3 days, gently wake it up and feed it, letting it become bubbly, active, and ready to work its magic on your bread.
What You'll Need
- Your dry sourdough starter pouch
- Lukewarm water (24°C–29°C)
- A clean glass jar or bowl (at least 500ml capacity)
- A kitchen thermometer (optional but helpful)
- A breathable cover (clean tea towel, cheesecloth, or loose lid)
Day 1: The First Feeding
Step 1: Empty your entire dry sourdough starter into a clean glass jar or bowl.
Step 2: Add 60ml of lukewarm water (24°C–29°C). Use your finger or a thermometer to check; it should feel slightly warm but comfortable to touch, like bathwater.
Step 3: Stir thoroughly until you have a thick paste with no dry pockets. It won't look like much yet; that's perfectly normal!
Step 4: Cover loosely with a breathable cloth or leave the lid slightly ajar. Your starter needs to breathe.
Step 5: Place in a warm spot in your kitchen, away from direct sunlight. Ideal locations include:
- Near (not on) a radiator
- On top of your fridge
- Inside an oven with just the light on
- In an airing cupboard
What to expect: Not much activity in the first 12-24 hours. You might see a few tiny bubbles; that's a good sign!
Day 2: The Second Feeding
Step 1: Check your starter. You should notice some bubbles forming and a slightly tangy smell developing.
Step 2: Discard about half the starter. Add 26ml of lukewarm water (24°C–29°C) and 30g of flour to your starter.
Step 3: Stir vigorously for 30 seconds to incorporate air into the mixture. This helps feed the beneficial bacteria and yeasts.
Step 4: Cover and return to your warm spot.
What to expect: More bubbles! Your starter should start to look livelier, with a foamy surface and a pleasant, slightly sour aroma.
Day 3: The Final Feeding & Readiness Check
Step 1: Your starter should now be noticeably bubbly and have doubled in size (or nearly doubled) since Day 1.
Step 2: Give it one final feeding with 26 mL of lukewarm water and 30g of flour. Stir well, and let it rest for 4-6 hours.
Step 3: Perform the readiness test:
- The Bubble Test: Your starter should be covered in bubbles and have a spongy, airy texture.
- The Smell Test: It should have a pleasant, tangy, and slightly yeasty aroma, not unpleasant or overly alcoholic.
Pro Tips for Starter Success:
Temperature is everything: If your kitchen is cold (below 20°C), your starter may take an extra day to mature. Be patient!
Consistency matters: Your active starter should be thick but pourable, like pancake batter. If it's too thick, add a splash more water.
Timing flexibility: If your starter is ready but you're not prepared to bake, feed it one more time and refrigerate it. It'll keep for 2-3 days. Bring it back to room temperature and feed it before use.
Trust your senses: A healthy starter smells tangy and fruity, not rotten or like nail polish remover. If something smells off, start fresh.
Part 2: Mixing Your Bread Dough
Now that your starter is bubbly and active, combine it with your bread premix.
What You'll Need
- Your activated sourdough starter
- Your Simple Bake bread premix pouch
- Lukewarm water (amount varies by premix; check your pouch)
- Oil (typically 2-3 tablespoons olive, sunflower, or your preference)
- A large mixing bowl
- A wooden spoon or spatula
- A loaf tin (greased or lined)
The Mixing Process
Step 1: Pour your entire bread premix into a large mixing bowl.
Step 2: Add your activated sourdough starter (you'll use most or all of it; refer to your specific premix instructions for details).
Step 3: Add the recommended amount of lukewarm water. Start with slightly less than the suggested amount; you can always add more, but you can't take it away.
Step 4: Add your oil. This keeps your bread moist and helps with texture.
Step 5: Mix thoroughly for 2-3 minutes until everything is well combined. The dough should be thick and sticky but hold together. Gluten-free dough behaves differently than wheat dough; it's more like a thick batter than a traditional dough, and that's exactly right!
Step 6: If the mixture feels too dry and crumbly, add water 1 tablespoon at a time until you reach the desired consistency. If it's too wet and runny, let it rest for 5 minutes so the flours can absorb moisture.
Part 3: Fermentation & Rising
This is where the magic happens! Your sourdough starter will slowly ferment the dough, developing incredible flavour and creating that characteristic sourdough tang.
The Fermentation Process
Step 1: Transfer your mixed dough into a greased or lined loaf tin. Smooth the top with a wet spatula or spoon.
Step 2: Cover the tin loosely with a damp tea towel or cling film.
Step 3: Place the dough in a warm spot (20°C–25°C is ideal) for 4-8 hours, or until it has risen by about 50% and appears puffy.
Fermentation Variables:
- Warmer kitchen (25°C+): 4-6 hours
- Cooler kitchen (18°C-20°C): 6-8 hours
- Cold fermentation option: Pop it in the fridge overnight (8-12 hours) for deeper flavour development. Bring to room temperature before baking.
What to look for: Your dough should look airy with small bubbles visible on the surface. It should jiggle slightly when you tap the tin.
Part 4: Baking Your Bread
The final stretch! You're about to transform your fermented dough into a beautiful, golden loaf.
Baking Instructions
Step 1: Preheat your oven to 180°C (160°C fan) / Gas Mark 4 while your dough finishes its final rise.
Step 2: Optional but beautiful: Score the top of your loaf with a sharp knife in a decorative pattern. This helps it expand evenly and looks gorgeous!
Step 3: Place your loaf tin in the centre of the oven.
Step 4: Bake for 45-55 minutes, depending on your oven and loaf size. Your bread is done when:
- The top is golden brown
- It sounds hollow when tapped on the bottom
Step 5: Remove from the oven and let it cool in the tin for 10 minutes.
Step 6: Turn out onto a wire rack and let it cool completely before slicing (we know this is the most challenging part!). Gluten-free bread needs this cooling time to set properly.
Troubleshooting: Common Issues & Solutions
My starter isn't bubbling after 3 days
Solution: Your kitchen might be too cold. Move it to a warmer spot, feed it again, and wait 12-24 more hours. Patience pays off!
My dough didn't rise much
Solution: Your starter may not have been active enough, or the fermentation spot may have been too cold. Next time, make sure your starter passes the float test and find a warmer location.
My bread is too dense
Solution: This typically indicates under-fermentation or insufficient liquid. Ensure your dough has a thick batter consistency, and let it rise for the full time.
My bread has a gummy texture inside
Solution: It needs more baking time! Gluten-free breads take longer to cook through. Bake for an extra 10 minutes and check the internal temperature.
The crust is too hard
Solution: Try covering your loaf loosely with foil for the last 15 minutes of baking, or brush the top with oil before baking.
My bread collapsed in the middle
Solution: Over-fermentation or too much liquid. Watch your rise time and start with slightly less water next time.
Pro Tips for Bakery-Quality Results
Invest in a kitchen thermometer: Consistent water temperature makes a huge difference in starter activity and dough performance.
Keep a baking journal: Note your timings, temperatures, and results. You'll quickly learn what works best in your kitchen.
Create a proofing box: Place your dough in the oven (turned OFF) with a bowl of hot water underneath. This creates a warm, humid environment perfect for rising.
Please don't skip the cooling: We know it's tempting, but slicing too early releases steam and creates a gummy texture. Wait at least 1 hour!
Store properly: Once completely cool, store in an airtight container or bag. Gluten-free bread stays fresh for 2-3 days at room temperature, or you can slice it and freeze it for up to 3 months.
Refresh day-old bread: Toast it, or warm slices in a 150°C oven for 5 minutes wrapped in foil. It'll taste freshly baked!
Experiment with flavours: Once you've mastered the basic method, try adding seeds, herbs, or dried fruit to your dough for variety.
Understanding Your Premix: Grain Profiles
Each Simple Bake premix has its own personality! Here's what to expect:
Buckwheat: Earthy, nutty flavour with a hearty texture. Naturally rich in protein and fibre. Perfect for robust sandwiches.
Oat: Mild, slightly sweet flavour with a soft crumb. Great for everyday toast and pairs beautifully with both sweet and savoury toppings.
Chickpea: Protein-packed with a subtle, savoury taste. Holds up wonderfully in sandwiches and retains moisture well.
Amaranth, Quinoa & Heritage Grains: Complex, distinctive flavours with ancient grain goodness. These premium options offer unique nutritional profiles and artisan character.
Why Sourdough? The Benefits
You might wonder why we use sourdough fermentation for our gluten-free breads. Here's why it's worth the extra time:
Better digestibility: Fermentation breaks down complex carbohydrates, making the bread easier to digest.
Enhanced nutrition: Sourdough fermentation increases the bioavailability of minerals and vitamins in the grains.
Superior flavour: That characteristic tangy depth you can't get from commercial yeast.
Longer shelf life: The natural acids in sourdough act as preservatives, keeping your bread fresh longer.
Lower glycemic index: Sourdough fermentation can help moderate blood sugar response.
Your Baking Journey Starts Here
Baking gluten-free sourdough bread might seem intimidating at first, but with Simple Bake premixes and this guide, you're already set up for success. Remember, every baker, even the pros, has had loaves that didn't turn out perfectly. Each bake teaches you something new about your kitchen, your oven, and your preferences.
We're here to support you every step of the way. If you encounter challenges or have questions, please don't hesitate to reach out. We love hearing about your baking adventures and seeing photos of your beautiful loaves!
Ready to get started? Grab your Simple Bake premix, set aside a few days for your starter to wake up, and prepare for the incredible satisfaction of slicing into your own homemade gluten-free sourdough bread.
Happy baking!
Do you have questions or would you like to share your baking success? Email us or tag us on Instagram @my_simple_bake we'd love to see your creations!